Welcome, fellow crafter! If you are reading this blog, then you might want to create your first-ever project with the Cricut Explore Air 2 machine. I will help you understand every bit of essential knowledge if you do not know where to start. This blog will offer you a beginner’s guide on how to use Cricut Explore Air 2.

Cricut Explore Air 2 is one of the advanced and versatile crafting tools that offers a flawless crafting experience. This machine works with Cricut Design Space to provide great cutting results. Also, Explore Air 2 needs to be set up first if you want to use it for crafting. Hence, go through the whole blog to attain everything there is to know about using this machine.
The Process to Setup Cricut Explore Air 2 on Your Computer
The process of how to use Cricut Explore Air 2 to create a project is necessary to set up the machine first. These are the steps you can follow for setting up your Cricut cutting machine on your computer or mobile device.
Windows/Mac
- Connect the machine to a power source to turn it on.
- Then, establish the connection between the machine and a computer/phone.
- After that, connect the printer to a USB cable or use Bluetooth connectivity.
- Now, visit the official website of Cricut on your PC.
- Next, download and install the Cricut Design Space from the website.
- Once the app download is complete, then create a Cricut account.
- When the machine setup is finished then, print a test cut.
Android/iOS
- Unbox your Cricut machine and then turn it On.
- Now, pair the machine to your Android/iOS device via Bluetooth.
- From the application store on your respective design, download the Cricut Design Space app.
- Once the Cricut app download is complete, launch the app and then sign in with your Cricut ID. (If you do not have an account, then create a new one on the app or on the website sign page.)
- Then, tap on the New Machine Setup option on the screen.
- Choose your machine name from the result to complete the setup.
- At last, the Cricut cutting machine will be ready for crafting.
Tools & Supplies to Create a Project With Cricut Explore Air 2
We must understand the supplies we need before starting with the process of how to use Cricut Explore Air 2.
- Cricut Explore Air 2 machine
- Materials (paper, cardstock, etc.)
- Cricut Heat Press machine
- Design Space app
- Transfer tape
- Weeding tools
- Cricut pens & markers
- Scissors, and many more.
Cricut Explore Air 2: How to Use It to Create a Project?
Once the Explore Air 2 machine is set and the essential supplies then start creating the project with your machine. Here is the full guide on how to use Cricut Explore Air 2.
Step 1: Create or Select a Design on the Cricut App
- Initially, you need to open the Cricut Design Space app on your Windows/Mac.
- After that, create a design you want to create. (In this blog, I am creating a telephone card design.)
- To create a design, you can go to the images, texts, and projects section to create a design from scratch. (Also, if you want, then you can upload the design from your device.)
- Once the design is complete, press the Make It button on the top right side of your screen. (Now, the machine will start the cut.)
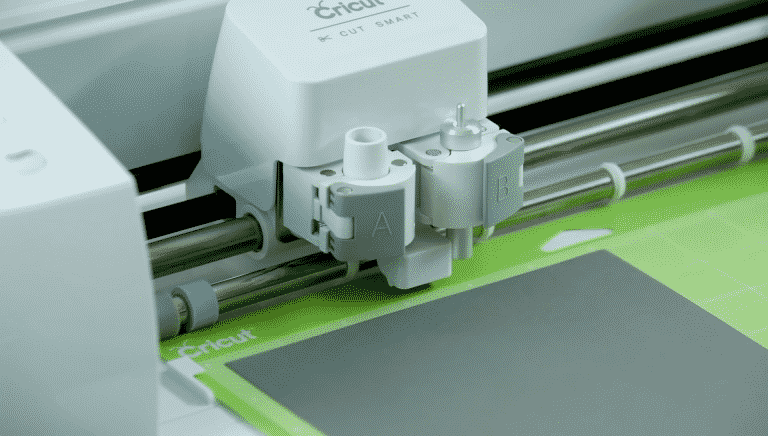
Step 2: Cut the Design Using Your Cricut Explore Air 2
- Now, load the paper on the Cricut mat to cut it on the machine. (Make sure to line up the paper to the top left corner of the app.)
- After that, load the mat into your Explore Air 2 machine to start the cut. (While loading the mat, you need to press the ‘Load/Unload‘ button.
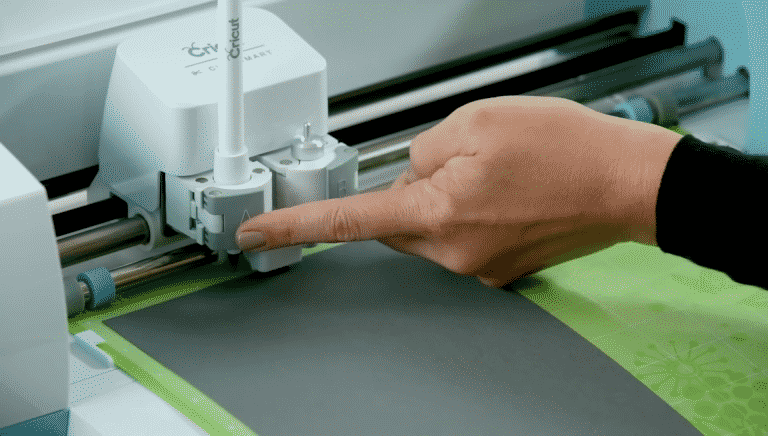
- Then, you have to open clamp A and insert the Cricut pen, as shown in the follow-up image.
- Also, open the mat preview screen to check the design and then press the Go button.
- Next, choose the cardstock option with the help of the dial on your Air 2 cutting machine.
- Now, you will notice that the C button on your Cricut machine will start to flash. Press this button to start the further procedure.
Step 3: Finish Your DIY Craft
- Now, unload the Cricut mat from your Explore Air 2 machine by pressing the ‘Load/Unload’ button.
- Then, remove the pen from the clamp A. (You can keep the pen in the extra storage space on the machine.)
- By keeping the mat upside down, peel off the paper from it.
- Next, fold the card over perfectly with the help of scale or anything else that is in perfect line.
- Whoa, your Cricut Explore Air 2 DIY craft is complete.
Conclusion
Here you got to know about the complete procedure of how to use Cricut Explore Air 2. With the help of this guide, you can easily create your first Cricut project, even if you are a complete beginner. Also, when you are creating a project, you must collect all the essential tools and set up the machine. For a detailed guide on the machine setup, you can browse the official Cricut website. So, start now and make a jaw-dropping DIY craft now.
Frequently Asked Questions
How to Use a Cricut Explore Air 2 to Create a DIY Project?
Below is a quick stepwise guide you can follow if you want to create a project with Explore Air 2.
- For the first step, please turn on the Explore Air 2 machine by connecting it to a power source.
- Then, complete the setup process of the machine to a computer/smartphone.
- Now, move to the Cricut Design Space app on your device.
- On the app, create a design according to your choice.
- Once the project design is complete, cut in with your Explore Air 2 machine.
- After the design cut is complete on your selected sheet then assemble the design.
- At last, your product will be ready to use.
Is Cricut Explore Air 2 Ideal for Crafting?
Cricut Explore Air 2 is the second iteration in the Explore series offered by the brand. This machine is best for cutting 100+ materials with precision and accuracy. Its sharp blade and powerful component provide the best DIY crafting experience. Its advanced features make it an easy-to-use crafting machine for both beginners and professional crafters. The Explore Air 2 machine is the best tool to create unique crafts in no time.
What Supplies Do I Need to Start Crafting With Cricut Explore Air 2?
If you want to create any DIY project with the Explore Air 2 machine, then here are the supplies you require. Also, the essential tools can vary depending on the project you are creating.
- Cricut Explore Air 2 machine
- Cricut Design Space app
- Crafting materials
- Transfer tape
- Cricut cutting mat
- Scissors
- Cricut markers & pens
- Cricut heat press machine, and more.

Leave a comment